- Browse/Search
- Help
- News
- Links
- About
- Contact
Registration, Login/Logout, and Reset Password
This introductory section to thesifter.org describes how to register for a new account and how to login, logout, and reset password on current or newly created accounts.
Registration
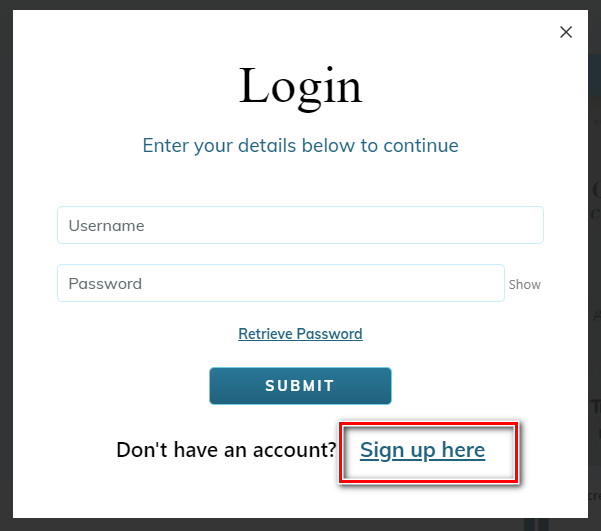
To register and create an account on The Sifter, select Login/Register from the navigation menu.

The Login popup opens. To register, select Sign up here.
The Registration page opens.
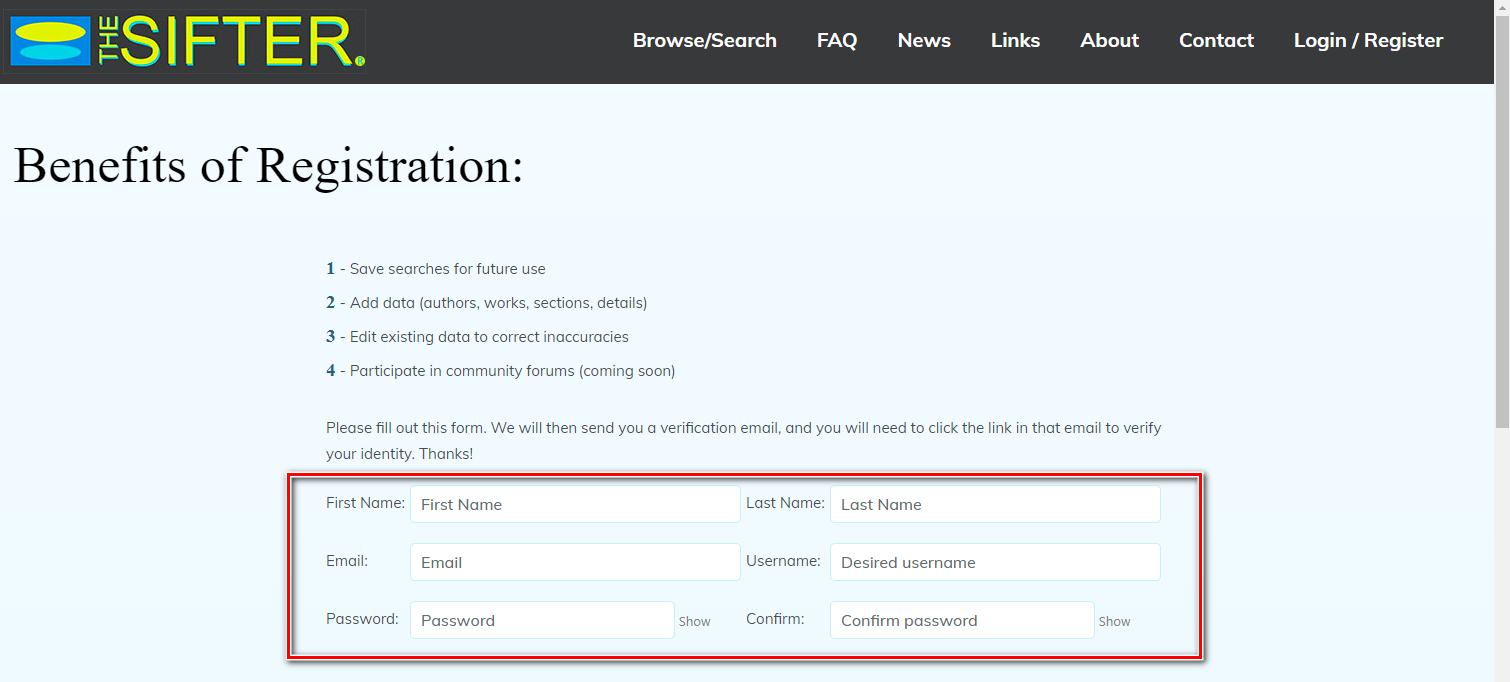
Complete the required information.
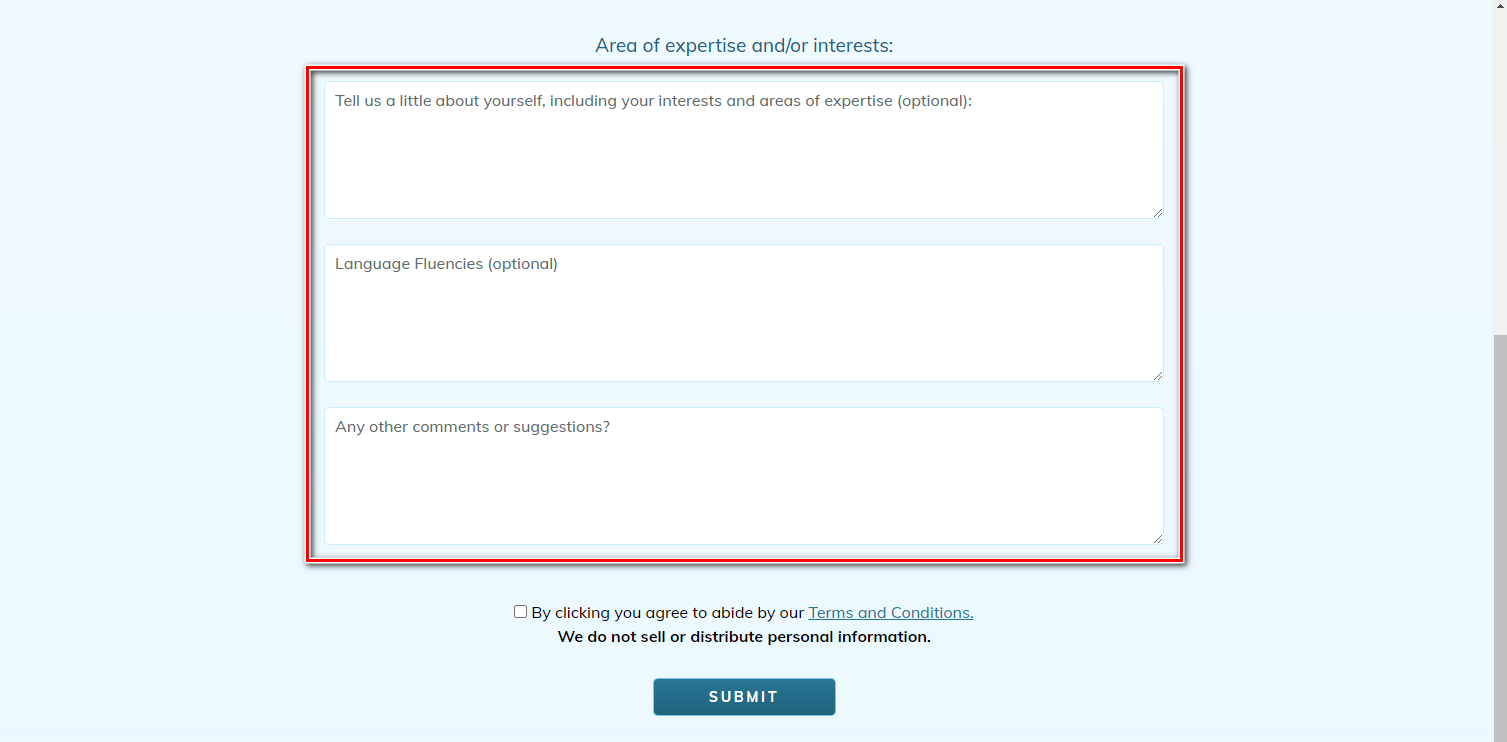
Complete the text fields (optional).
After reading the Terms and Conditions, check the box signifying that you agree.
Select SUBMIT.

The Success popup opens but to complete the registration be sure to confirm to the email you will receive.
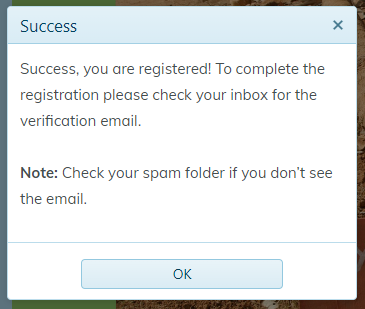
Click OK. After receiving your email, click the here link in your email. The last Success message opens.
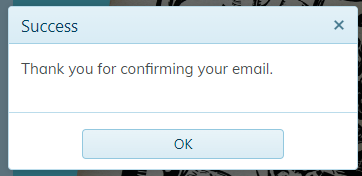
Click OK to open the home page.
Login
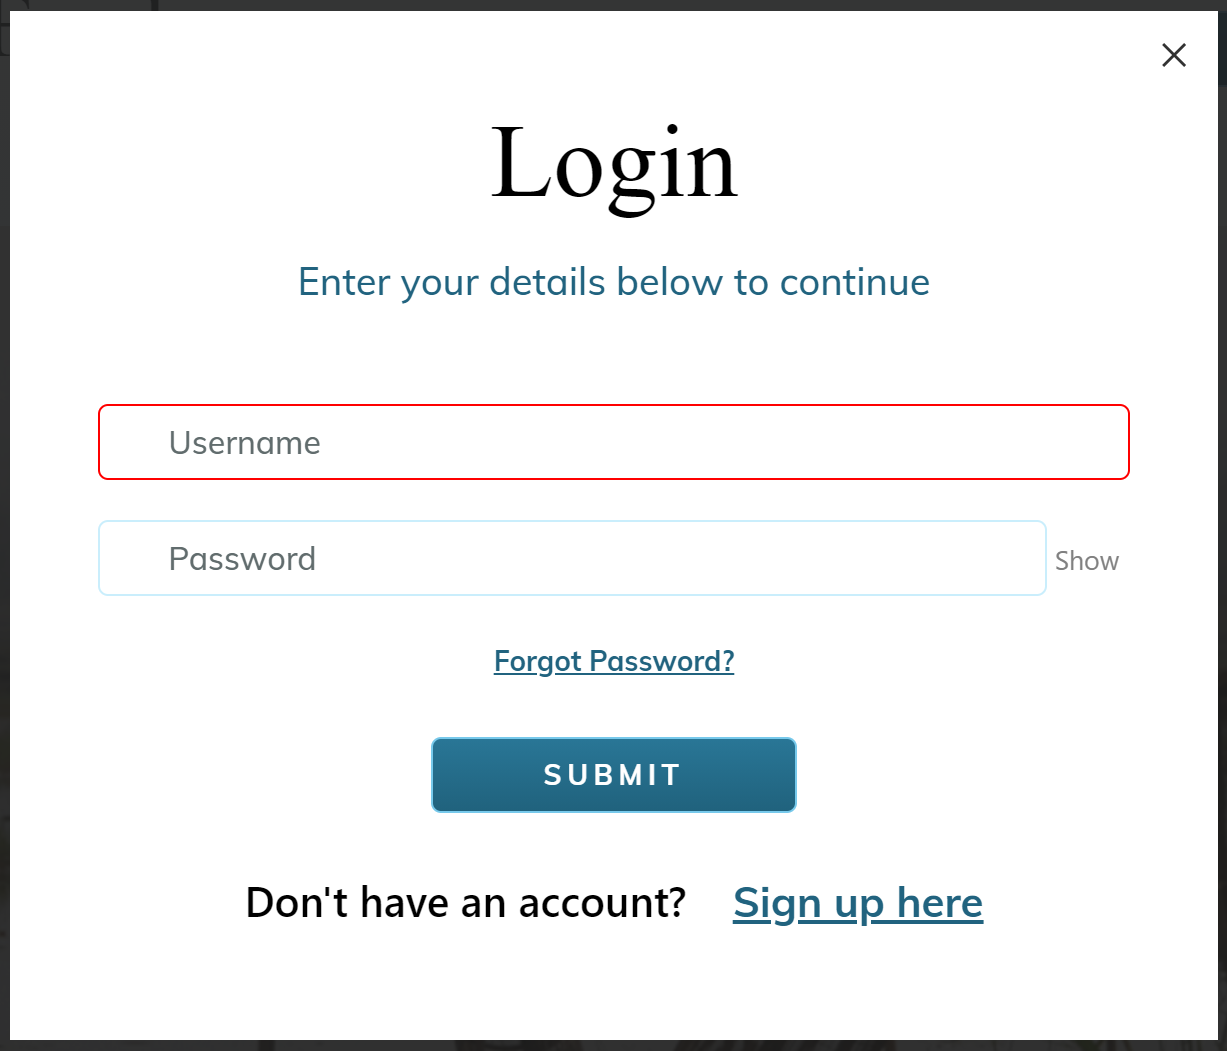
Open the Sifter website home page, thesifter.org. To login, select Login/Register from the navigation menu.

The Login popup opens. Enter the username and password and click SUBMIT.
The home page opens. When logged in, your username will display in place of the Login/Register button.


Logout
Please note that you will be automatically logged out after 1 hour of inactivity.
To log out, hover the cursor over your username. A drop down with a selection for Logout opens. Click Logout.


Password Reset
If you forgot your password, you can reset it with the following steps:
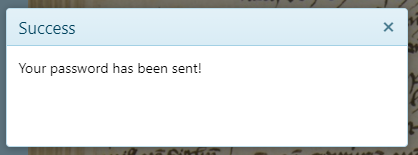
After attempting to log in, and seeing the Login popup, click Retrieve Password. The Success popup opens.An email is sent to you with your correct password. Use the password to log in.

How to Browse the Sifter
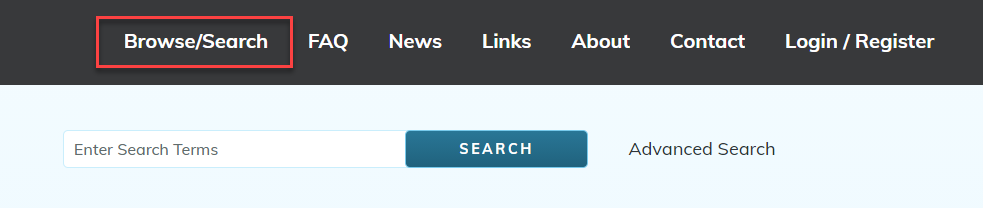
To browse any of the categories on The Sifter, go to Browse/Search then click on any of the categories located in the left pane menu. A list will open for the user to browse through.
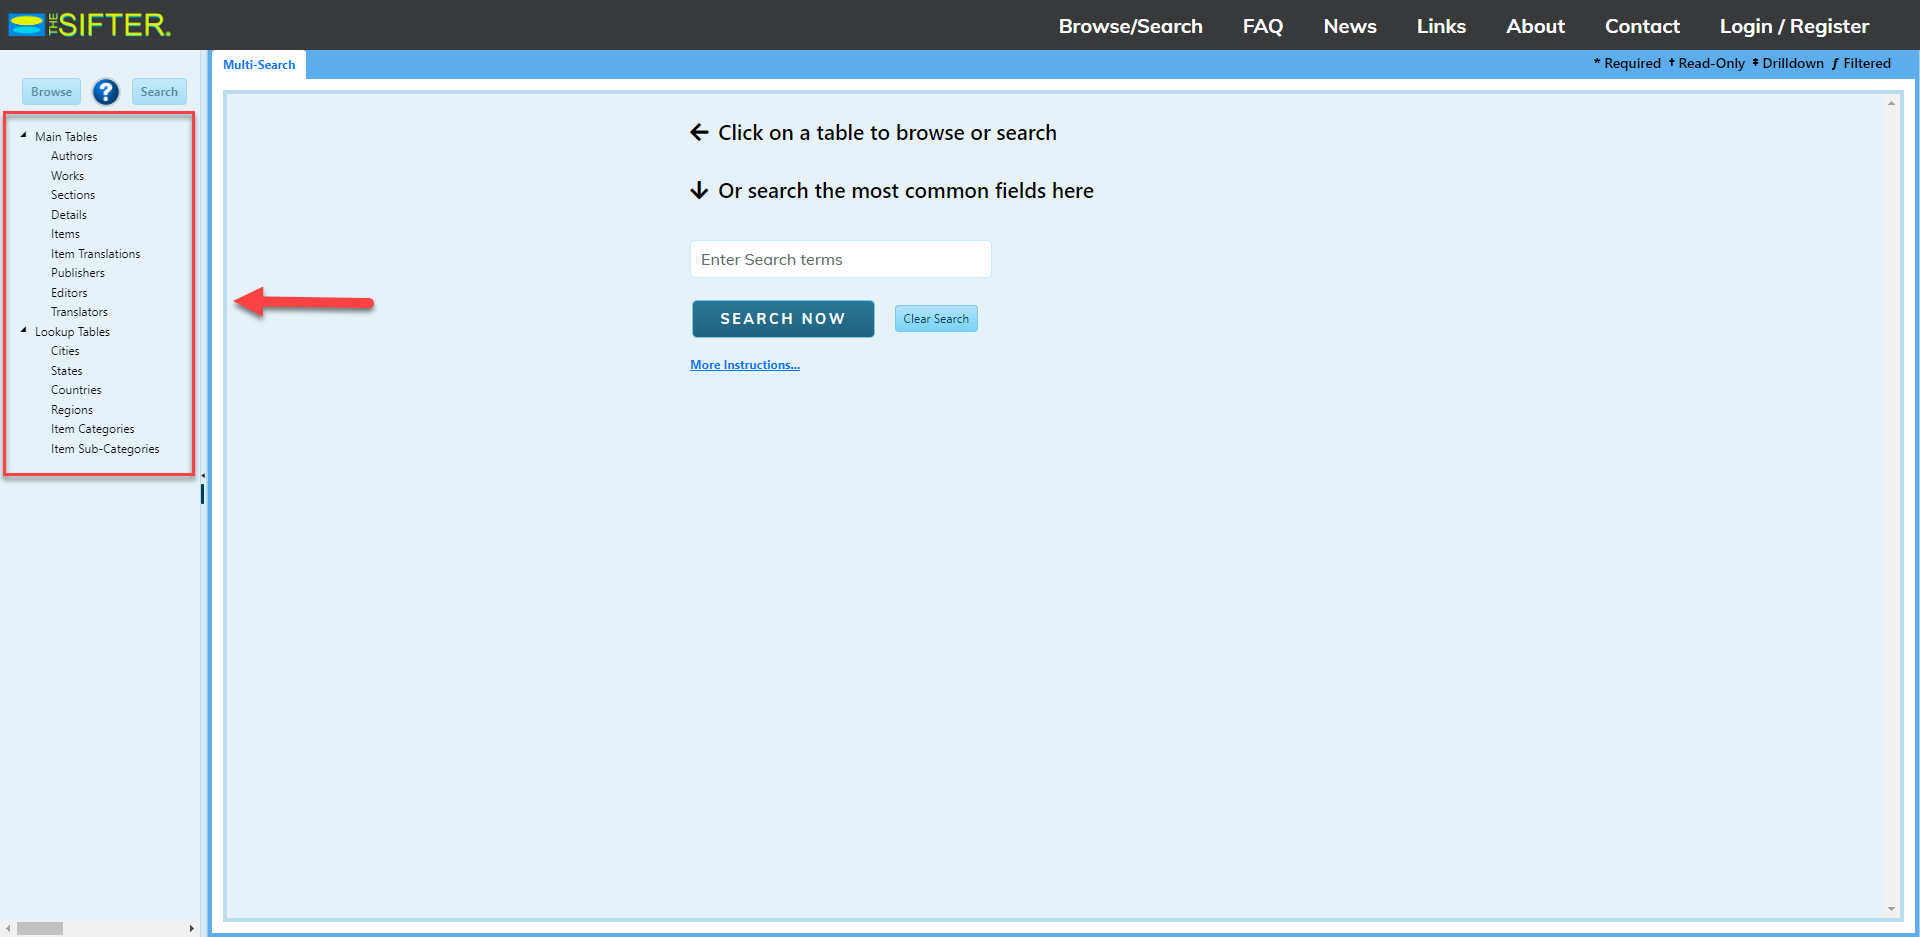
After a category is selected, the table will open and display a list.

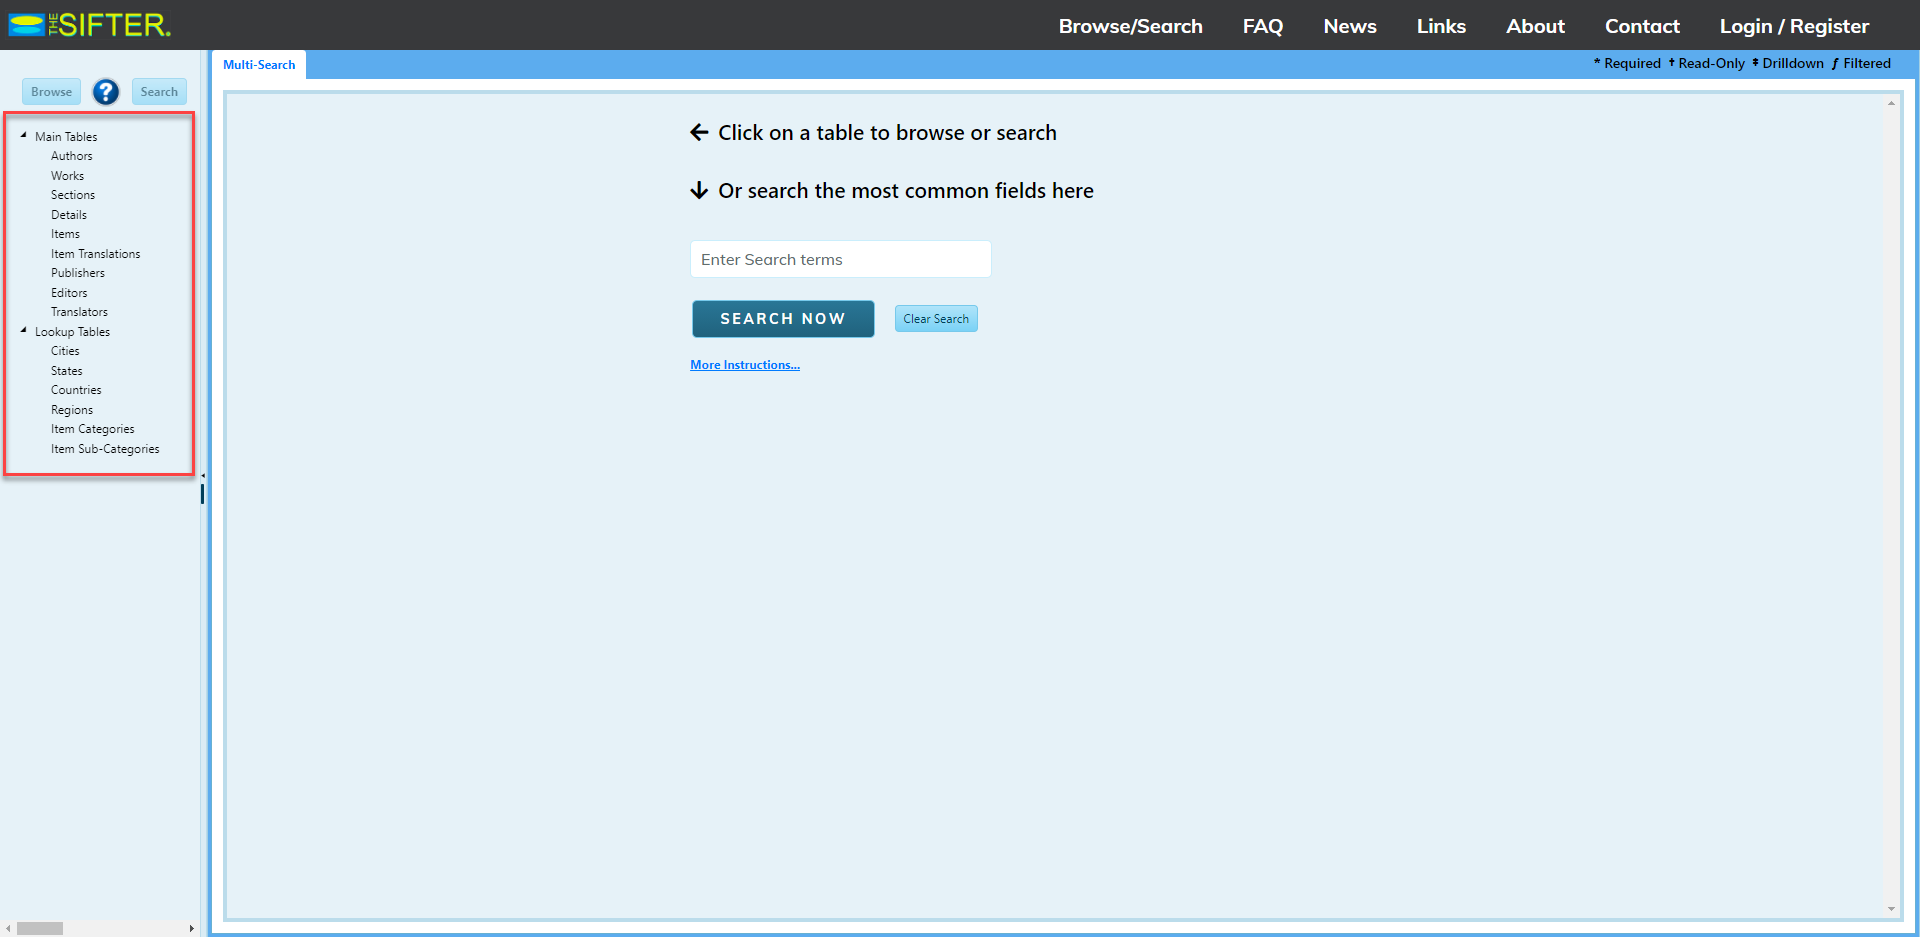
Users may browse any category located in the sidebar menu. The principal tables are:
- Authors: a person, organization, institution or group
- Works-linked to an author: cookbooks, manuscripts, etc.
- Section-linked to the work: recipes, illustrations, menus, etc.
- Details-linked to a section: items in a section (eggs, cheese, spatula, cook 50 min., etc.)
-
Items: a master list of
- actions: whisk, bake, stir, etc.
- ingredients: abalone, absinthe, acorn, etc.
- equipment: abalone, absinthe, acorn, etc.
- materials: cloth, twine, stone, etc.
- measure: tsp, liter, acre, etc.
- author's advice: attribution, serving suggestions, nutritional advice, etc.
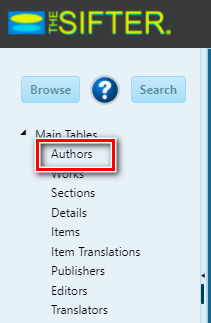
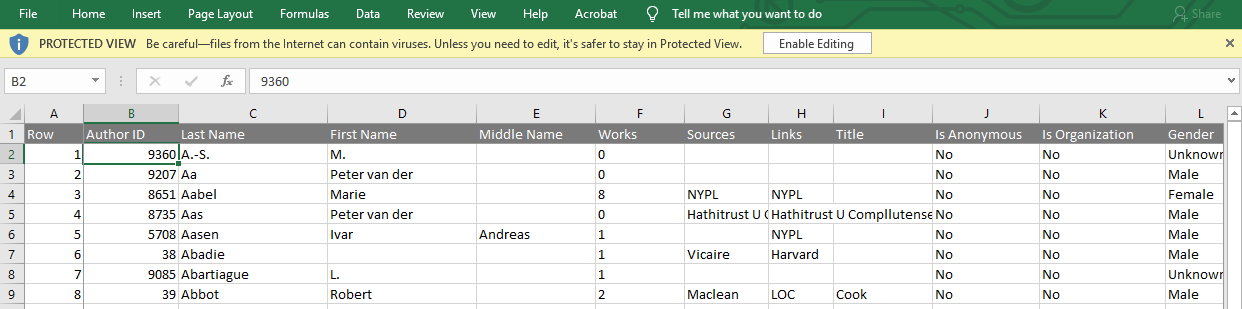
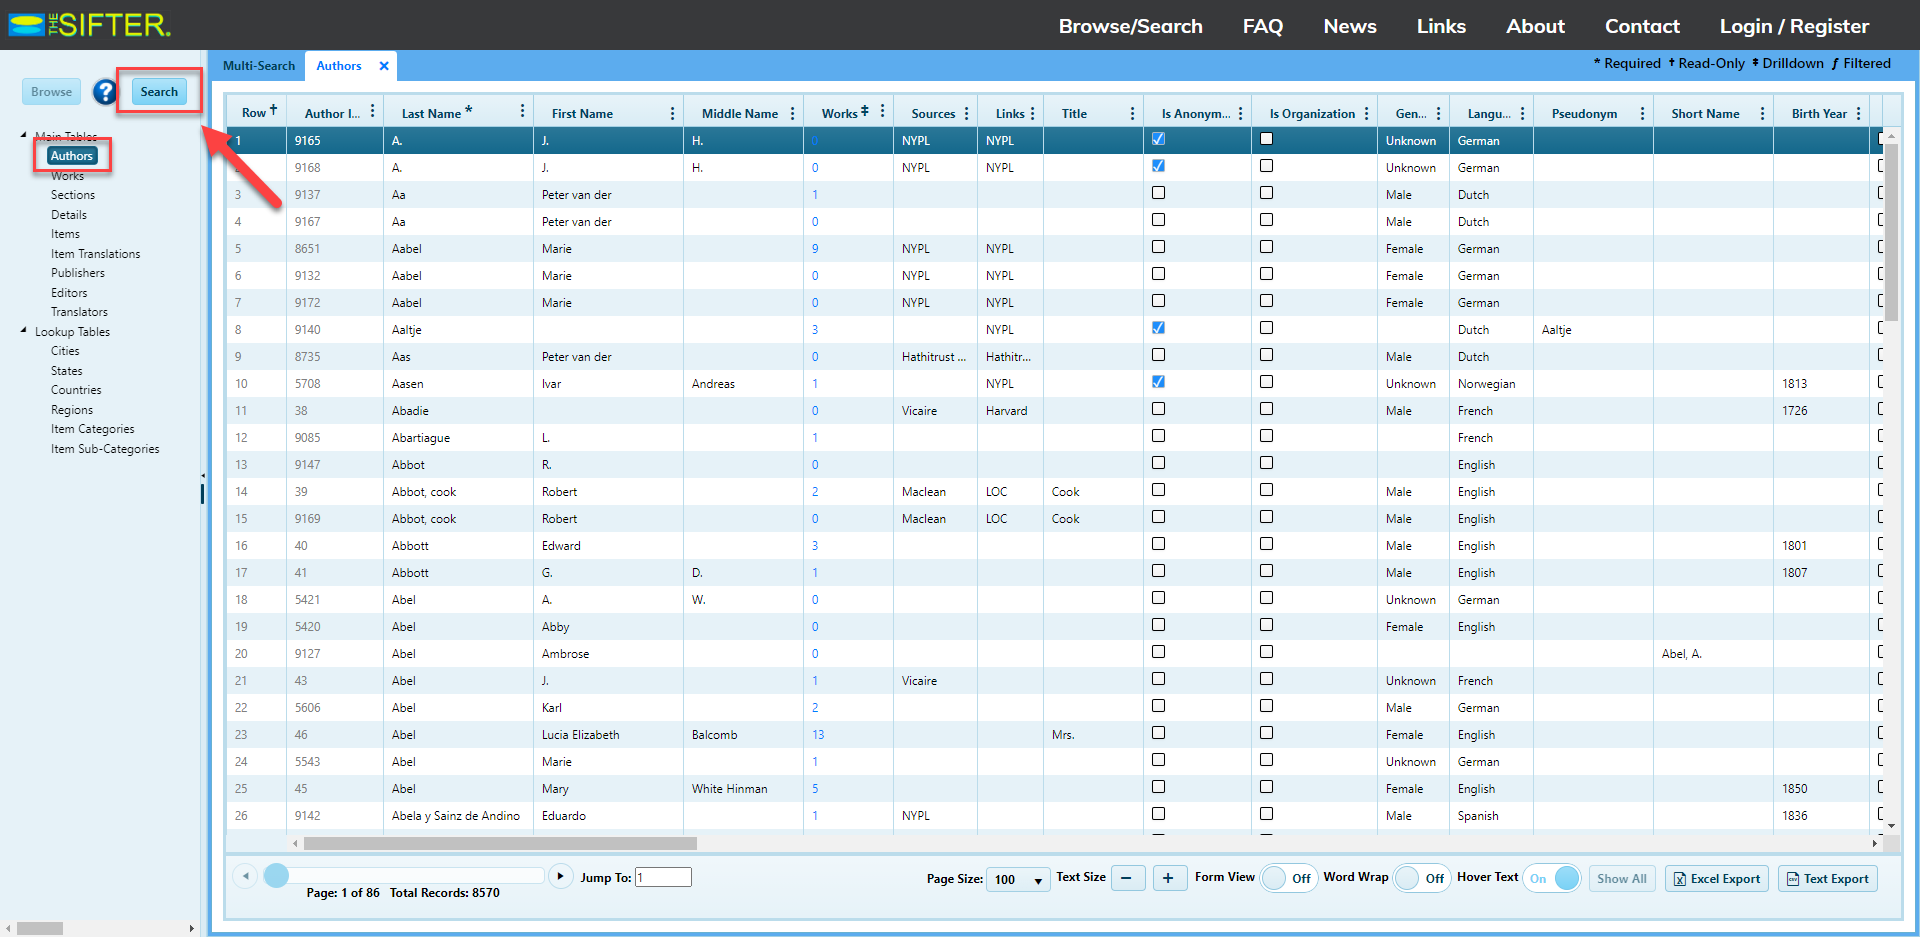
The example below is a search for Authors. Click on Authors under Main Tables at left.
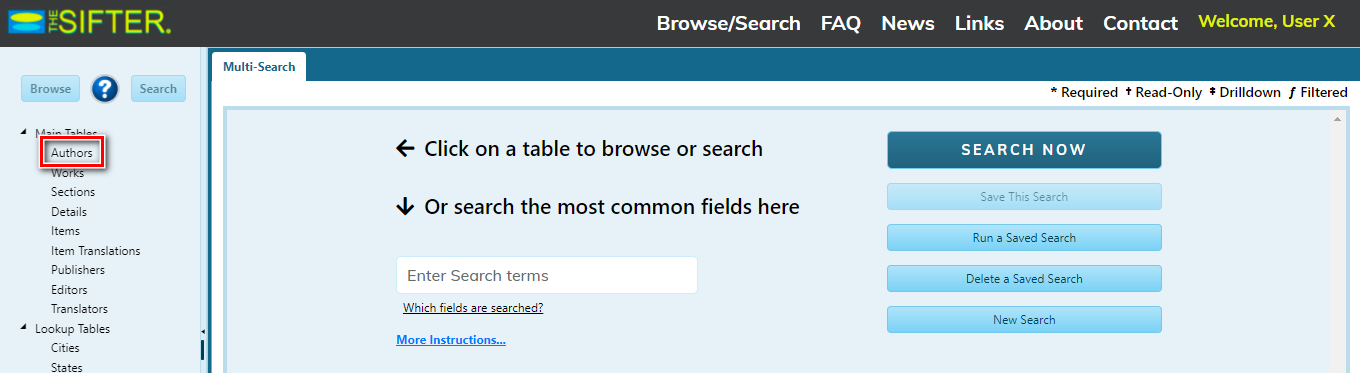
A page with a list of authors opens.
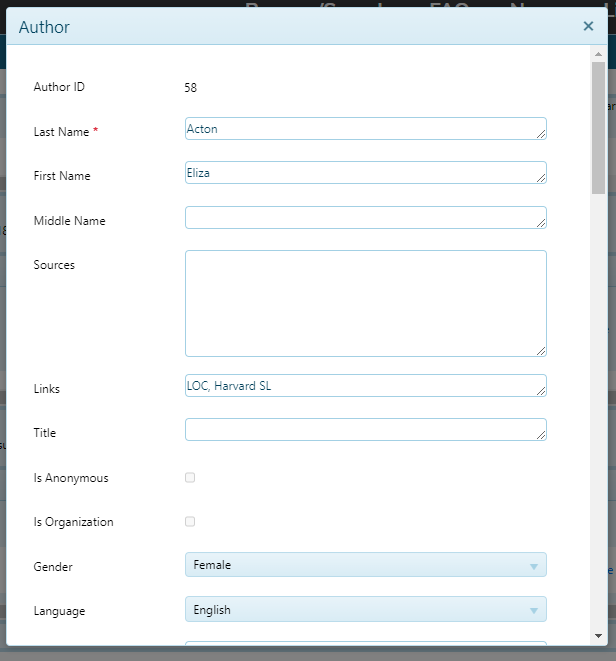
To see detailed information about an Author (for example), select an Author by highlighting that row in the list.

Turn Form View On.
The page below opens.

Scroll down to see the complete list of information related to that author
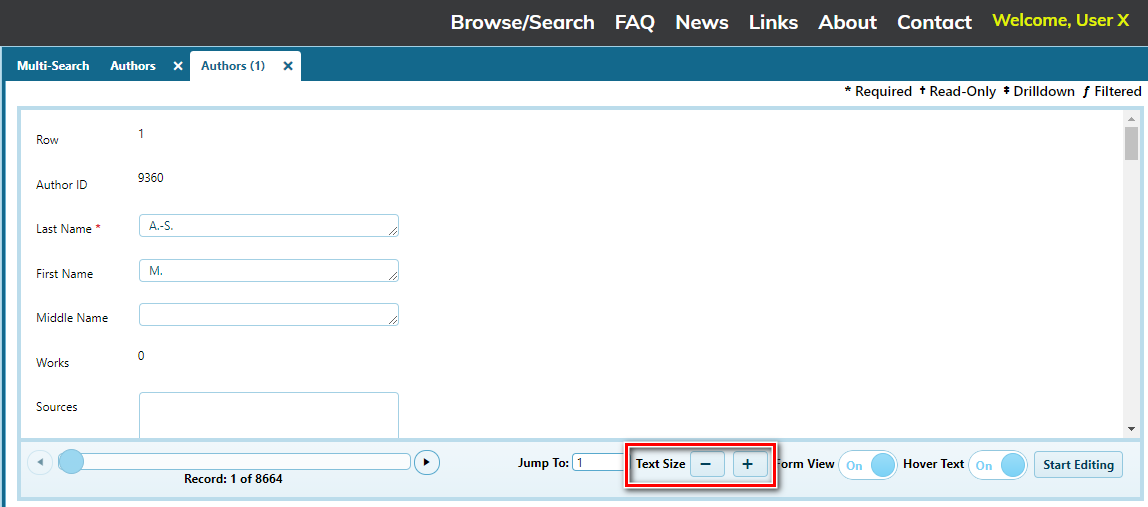
If desired, adjust the text size by clicking the appropriate button.

How to Search the Sifter
The Sifter includes several locations for searching and browsing the database. You can access the search from both the Home and Browse/Search pages. Search options are based on whether you are using the database as a guest (not logged in) or as a registered user (logged in). Registered users also have access to multiple options such as saving a search (for future use or reference) and adding or editing search records.
Example Search #1
Enter your search term, for example, cake.
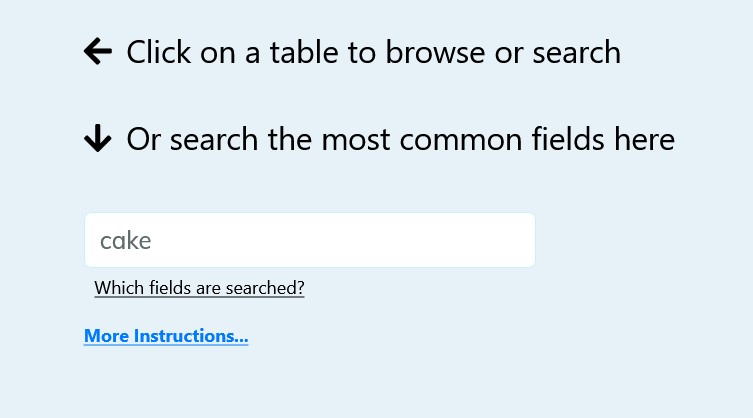
Click Search Now.
Scroll down the page to see your search results.
Example Search #2
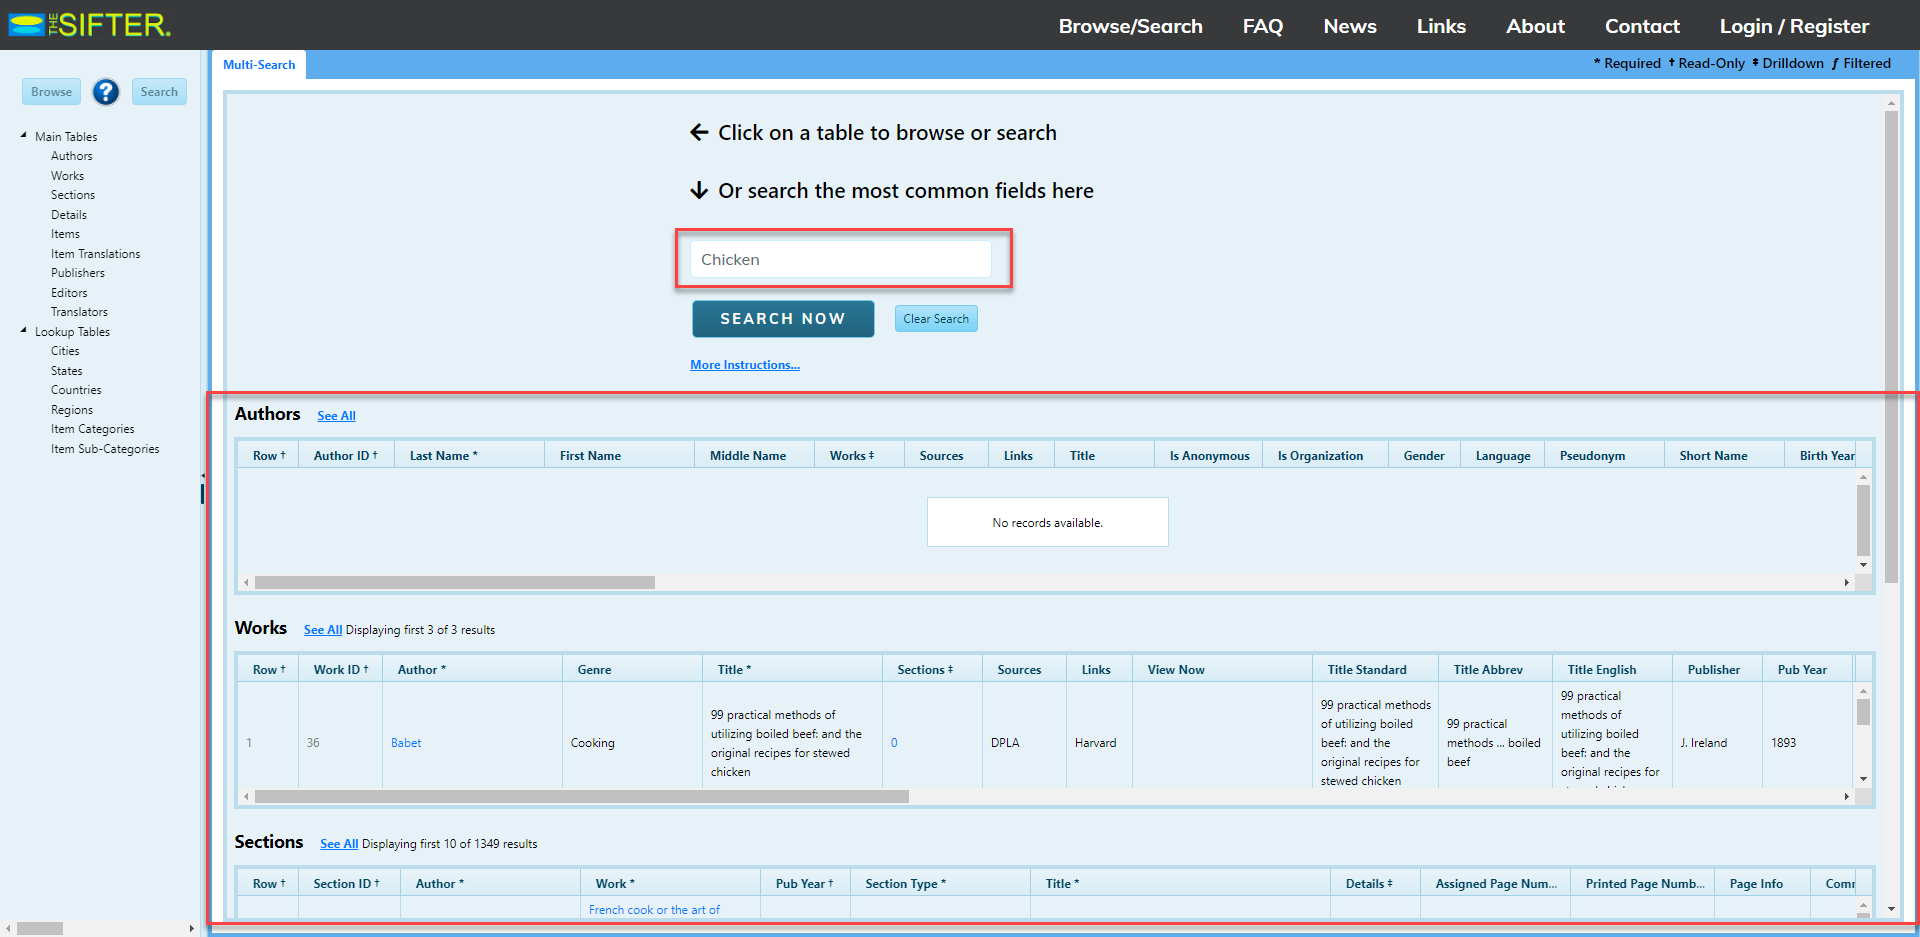
Using the Multi-Search feature on the Browse/Search page, type a recipe into the search terms text field. Modern is used in the example below.
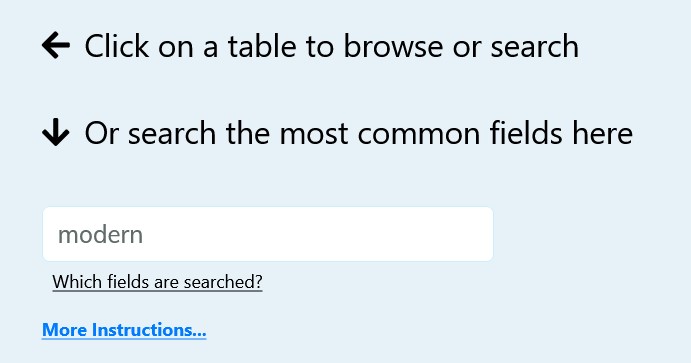
Select to launch the search. Any mention of “Modern” in the Sifter database populates the search results. Categories searched include Authors, Works, Sections, Details, Items, and Item Translations.

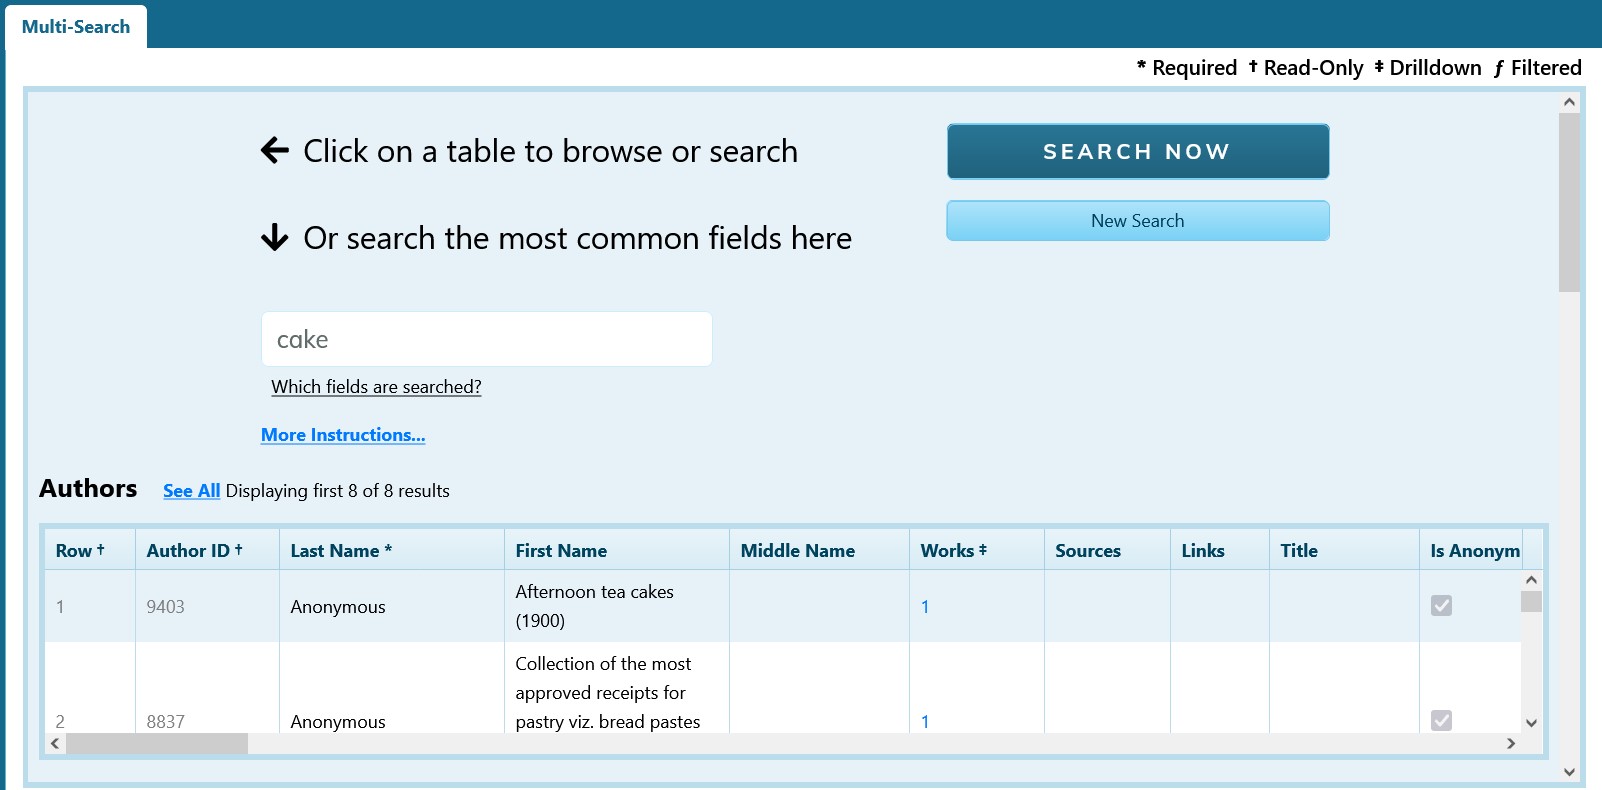
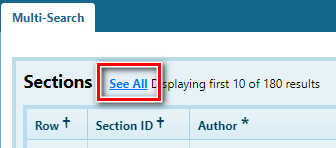
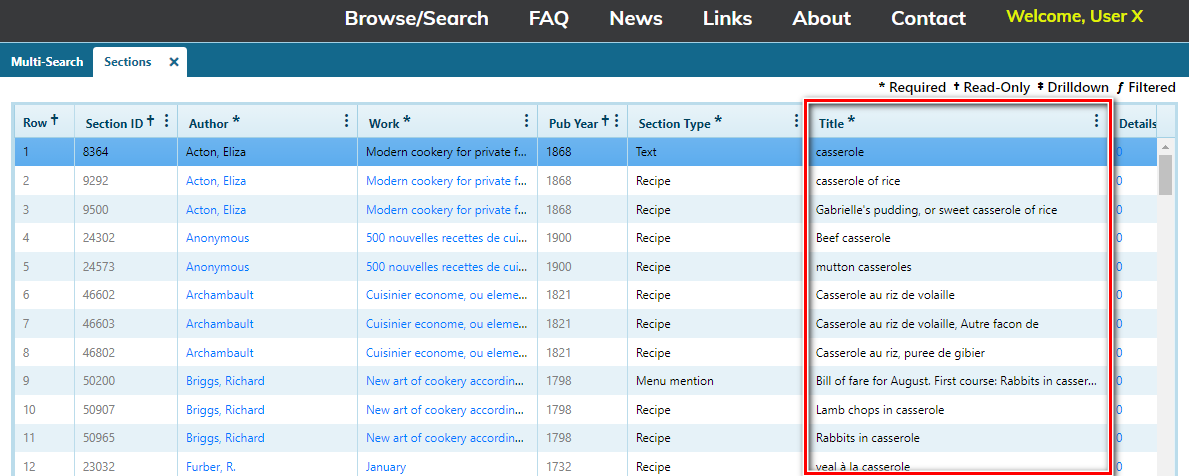
The page below shows the Works section. Click See All to display the entire list.


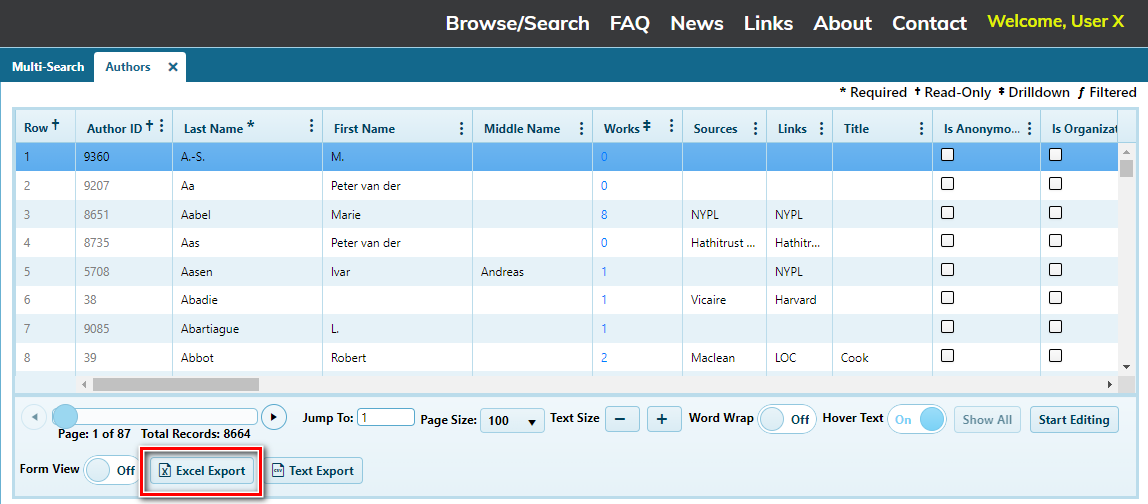
To download the search results as an Excel spreadsheet, select Excel Export.
The file is downloaded to your computer.

To download the search results as an Excel CSV file, select Text Export.

The page below shows Sections and Details.

In Sections, click See All to expand the list of titles.

In Sections, you can click the Author for detailed information.
Scroll down to see all the text fields.
Or click See All to view results in a table.
A list of casserole recipes opens.
Quick Searches
The following are quick, specific examples on how to use the Search feature on The Sifter.
Quick Search by Terms and Keywords
A user can search by terms or keywords by performing a general search on the homepage via the search bar.

Another way to perform general term/keyword search is via the Multi-Search tab on the Browse/Search page. Go to Browse/Search, then enter the term/keyword in the search box and select Search Now.
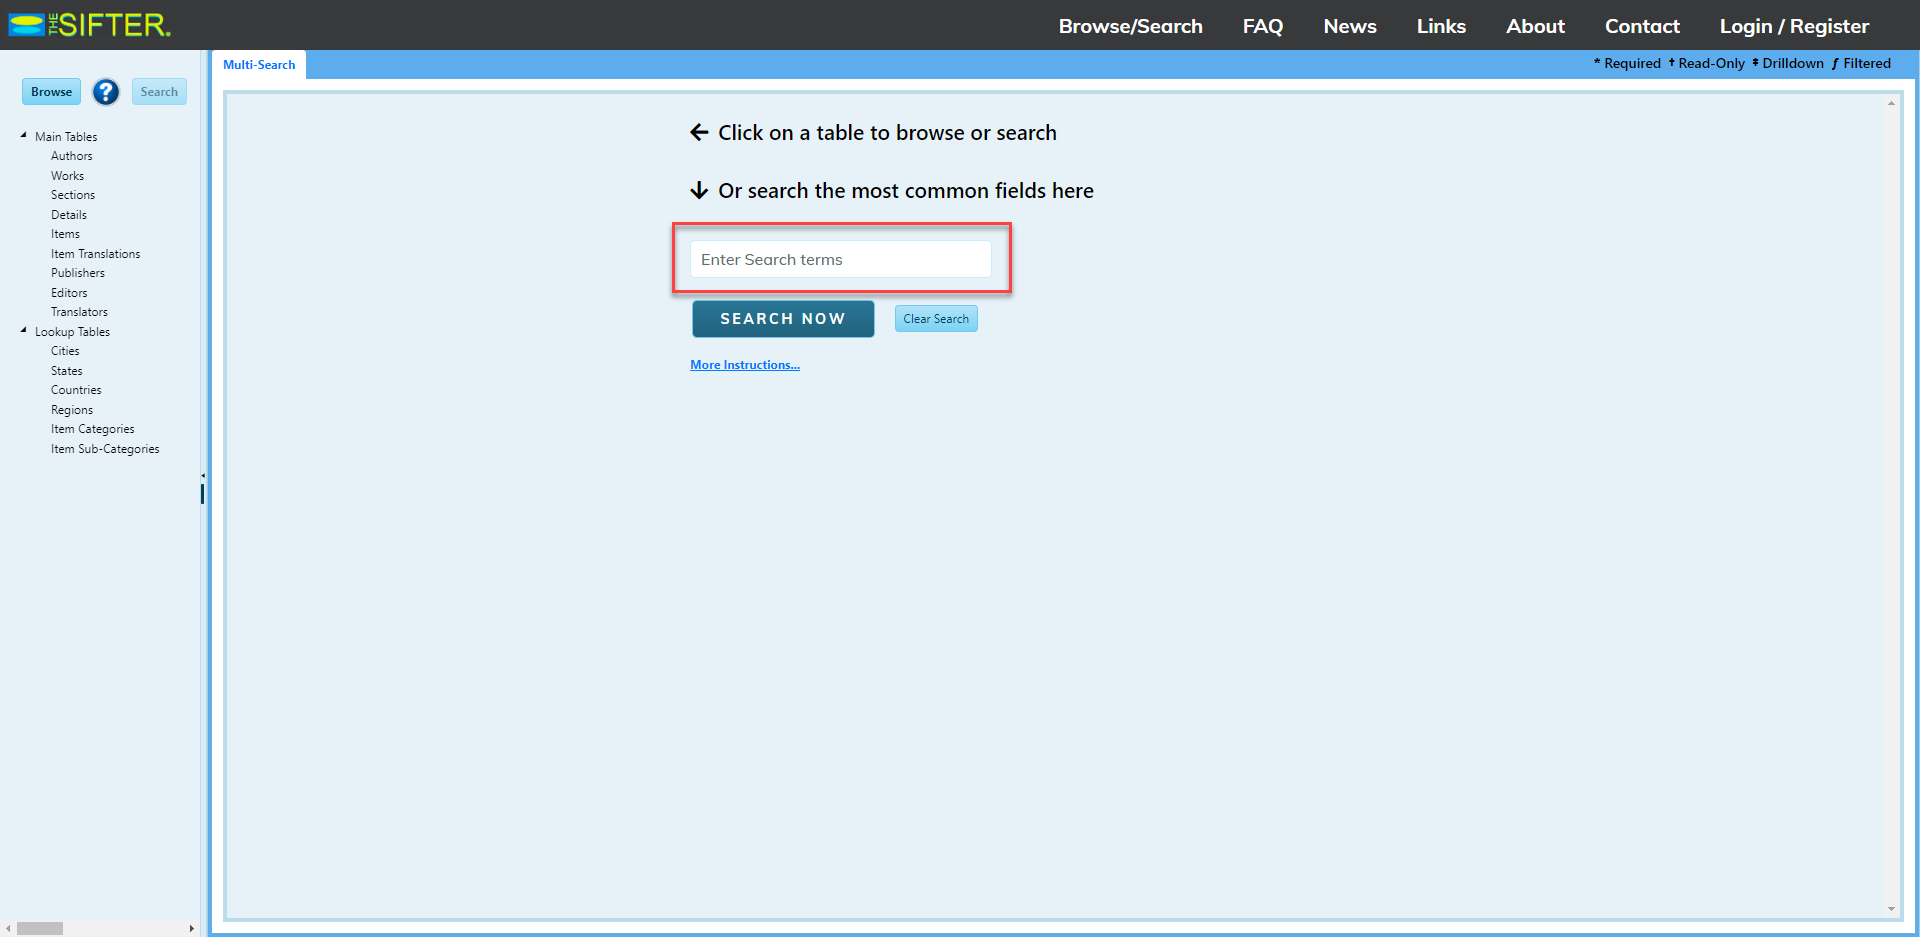
The search results will be separated by category.
Advanced Search
Use the general search box for quick searches throughout all the data for any given keyword or phrase (put phrases in quotes), or the Advanced Search, where you can specify any number of criteria across all the tables.
The general search box (below) is for quick searches throughout all the data for any given term, keyword, or phrase (put phrases in quotes).
Advanced Search allows you to specify any number of criteria in the table. Click on browse to see Authors, Works, Sections, Details, and Items. Filter data by clicking on these column headers.

Main and Lookup Tables
This section describes how to search within the Main and Lookup Table categories on thesifter.org. Main and Lookup table categories are displayed in the sidebar on the Browse/Search page. All tables listed can be searched by using any of the search features listed on thesifter.org.
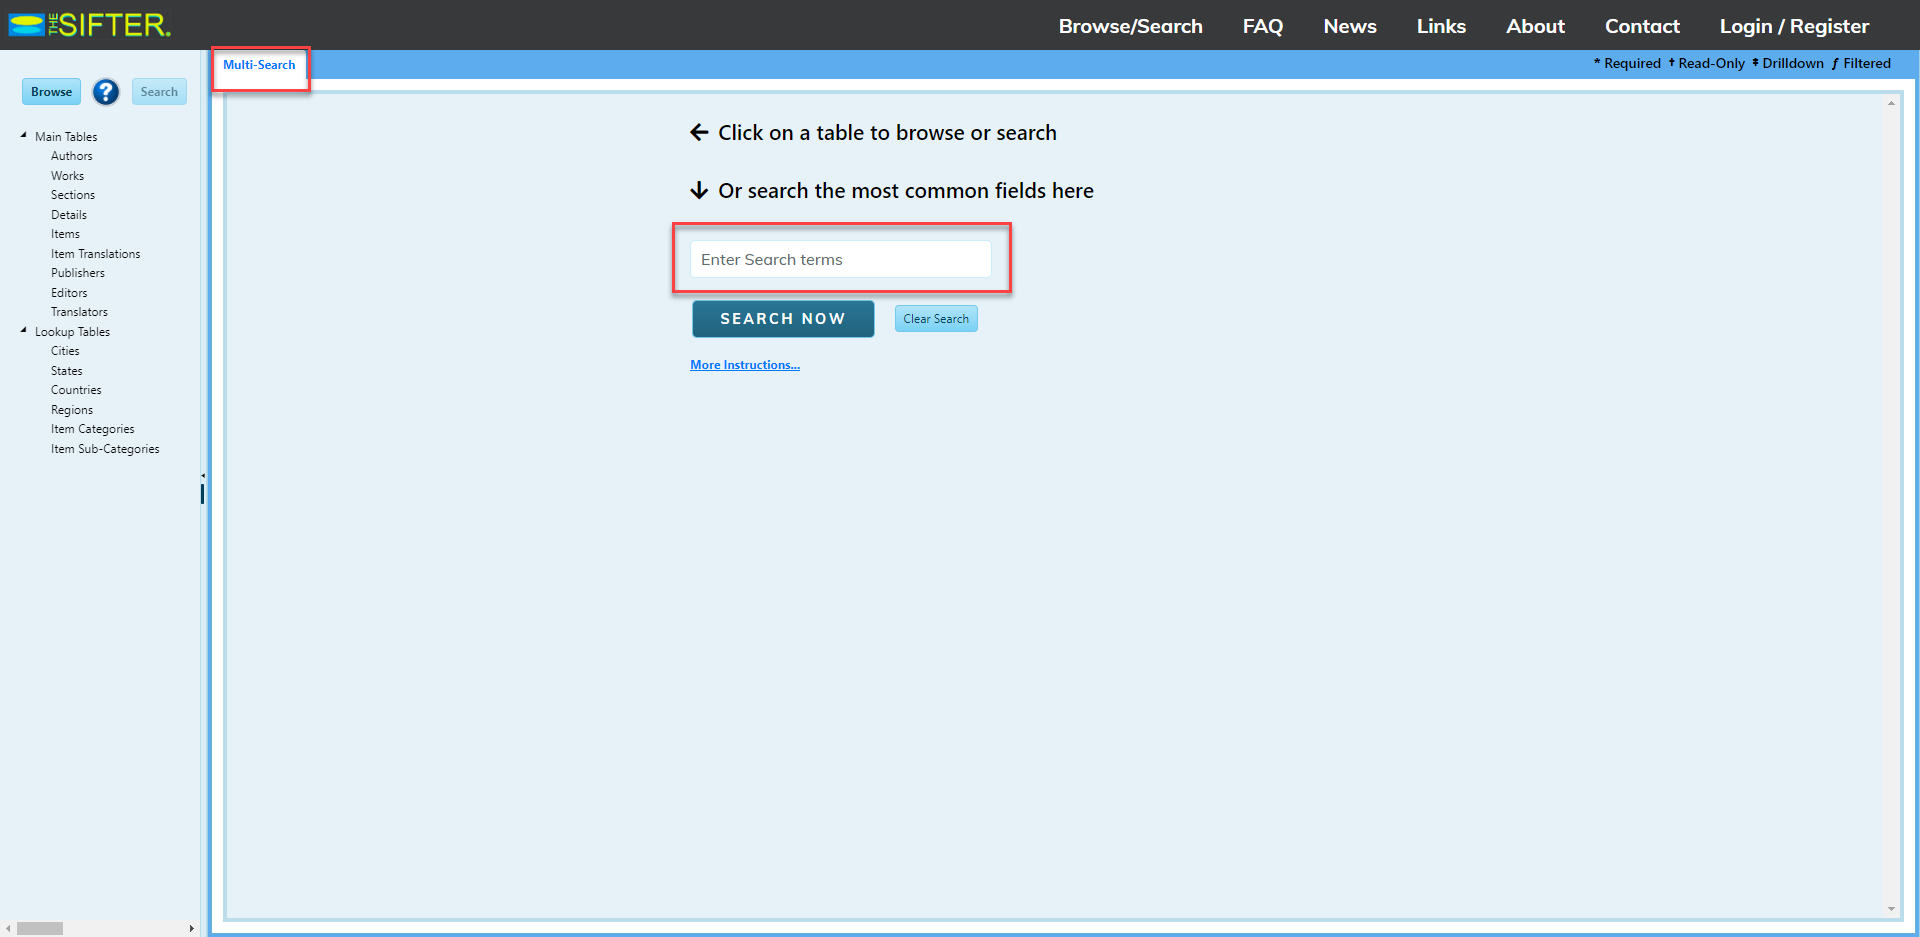
Multi-Search Tab
The Multi-Search tab on the Browse/Search page allows a user to search for terms or keywords across the database and sorts them by category.
Recipe Search
Using the Multi-Search feature on the Browse/Search page, type a recipe into the search terms text field. Casserole is used in the example below.
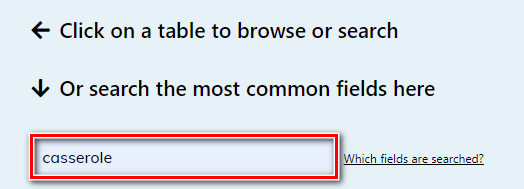
Select to launch the search. Any recipe or mention of “Casserole” in the Sifter database populates the search results. Categories searched include Authors, Works, Sections, Details, Items, and Item Translations.

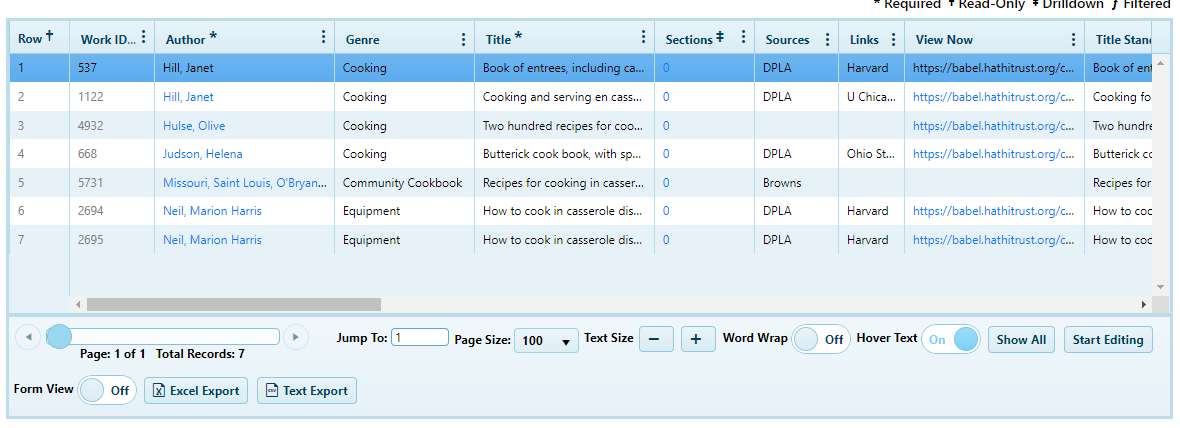
The page below shows the Works section. Click See All to display the entire list.

The page below shows Sections and Details.

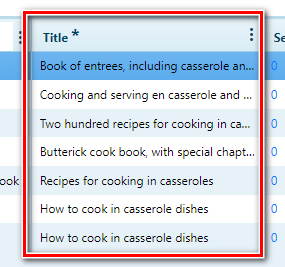
In Sections, click See All to expand the list of titles.
In Sections, click the Author for detailed information.

Scroll down to see all the text fields.
Or click See All to view results in a table.

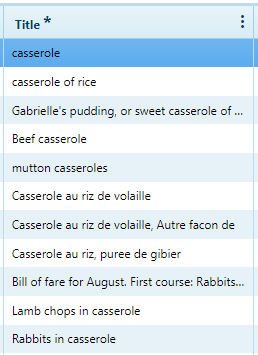
A list of casserole recipes opens.

Authors Search
The Sifter contains a database of Authors associated with food history and food recipes. To quickly search and find any of the hundreds of Authors within the database, type an author name into the text field on the Multi-Search page (accessed via Browse/Search). Select to launch the search. A list of matching Authors and their Works displays.
Works Search
You can search for certain types of publications by type or genre. To search, type the work (book title, for example) into the text field on the Multi-Search page (accessed via Browse/Search).. Select to launch the search. A list of matching Authors, their Works , and Sections displays.
Sections Search
You can launch a search for Works or items by their section type. To do this, access the Multi-Search page (via Browse/Search) and type a term into the text field, for example, a “Section ID.” Select to launch the search. A list of matching terms displays.
Item Search
When using The Sifter, you can search for types of material used in food history, cooking, or cookware. From the Multi-Search page (accessed via Browse/Search) type an item in the text field, for example, “ingredient.”. Select to launch the search. A list of matching terms displays.
Item Translations Search
To search for items that are written or translated into a specific language, type the language name into the text field on the Multi-Search page (accessed via Browse/Search). For example, type “French.” Select to launch the search. A list of matching entries in the Authors, Works, Sections, Details, Items, and Item Translations are listed.
Category Search
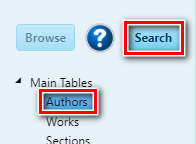
Go to Browse/Search then click on any of the categories located in the left pane menu. Once the category list opens (see Browse), select the Search button. The Search page will open.
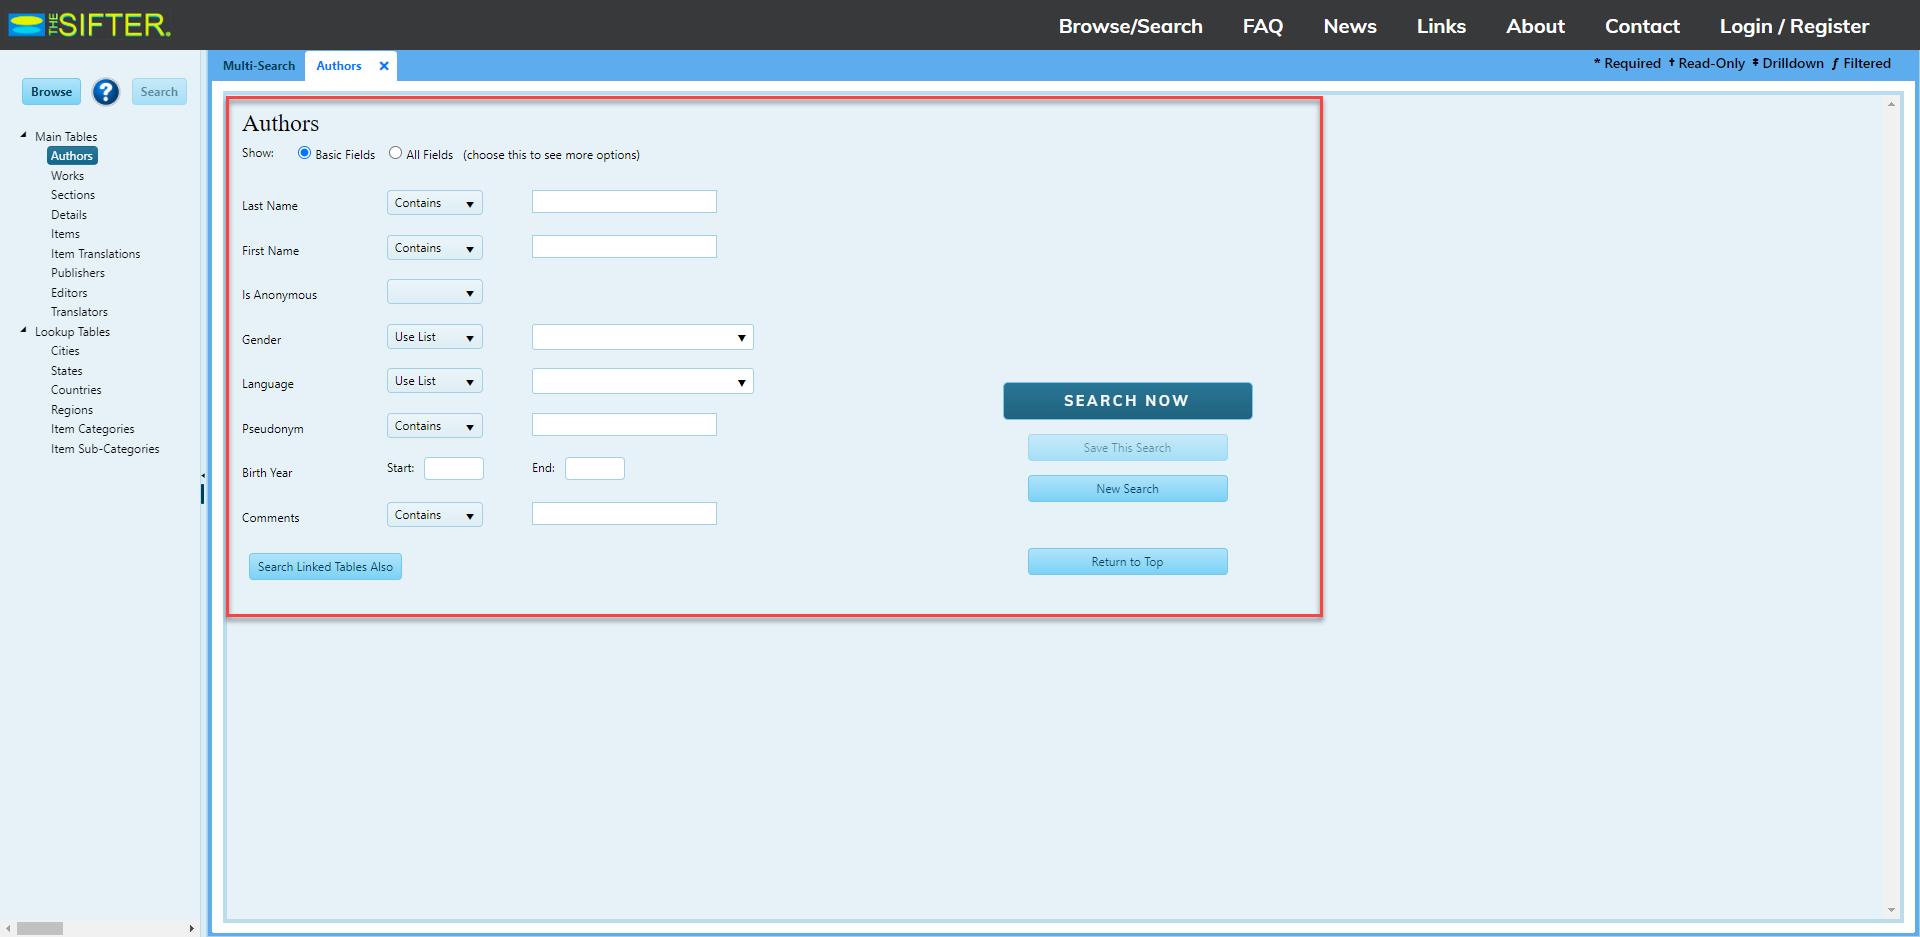
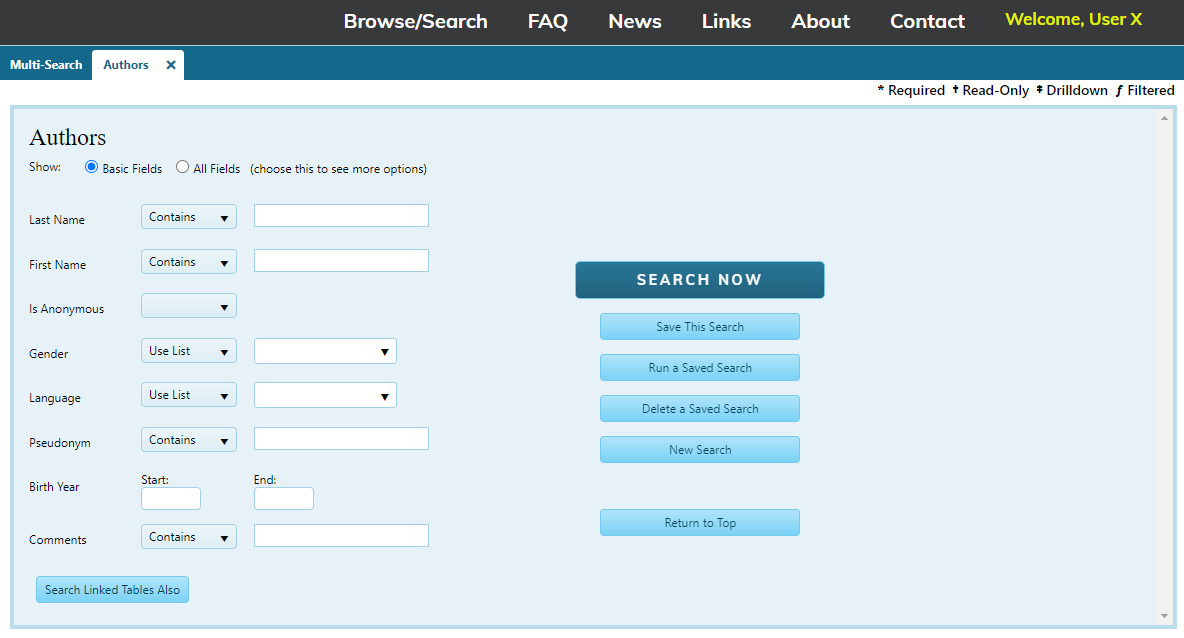
Searching a Table Category Using Basic Fields
You can search any table or category in the left sidebar on the Browse/Search page. Select a category (authors, sections, etc.), then click the Search button.
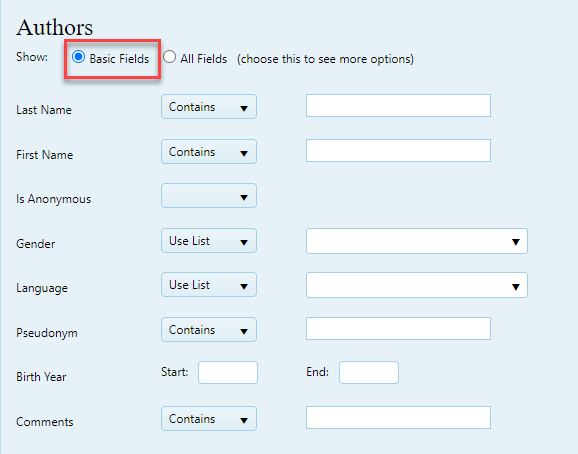
A page opens showing the Basic Fields
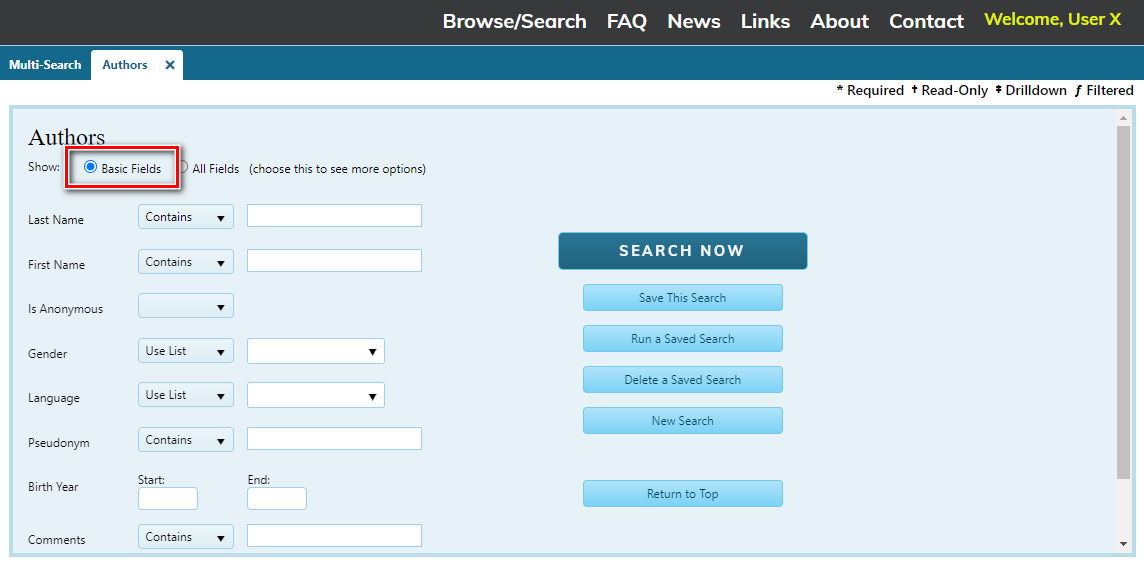

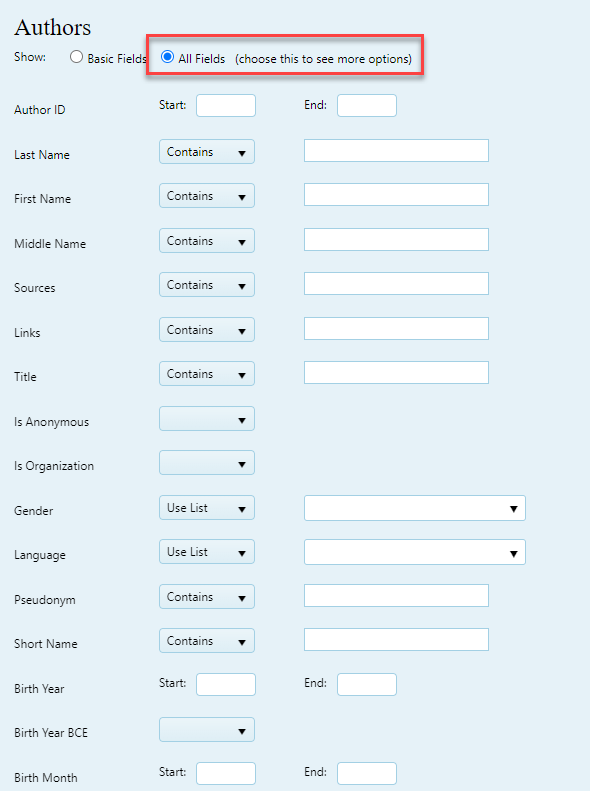
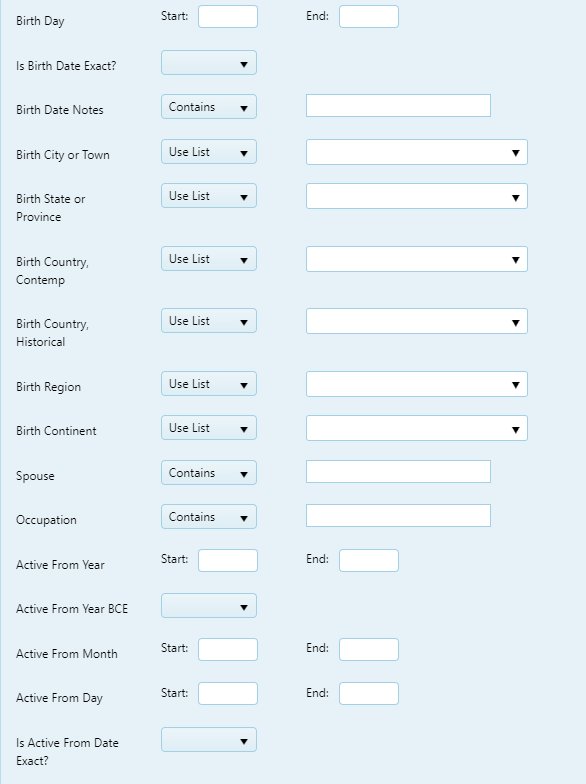
Basic and All Fields Search
Use Basic Fields to search Last Name, First Name.
Use All Fields for searching multiple search criteria such as Title, Organization, etc. Choose the option that is most appropriate based on the amount of information you have.


Create your search by selecting from the dropdown lists, completing the text fields, and selecting .

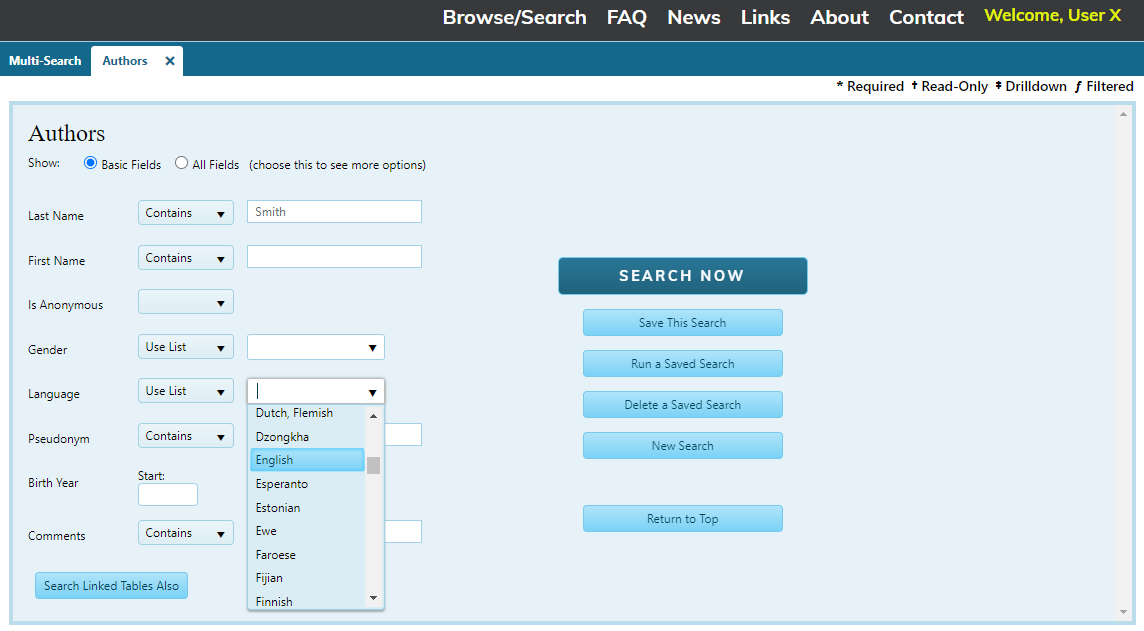
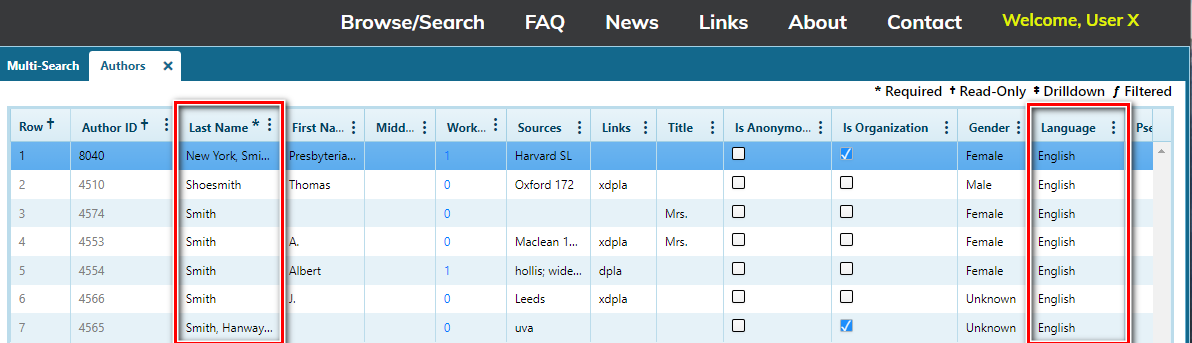
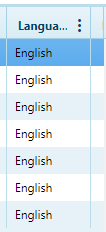
When Last Name Smith and Language English were selected; the search results are shown below.
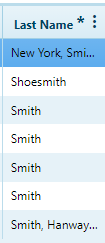
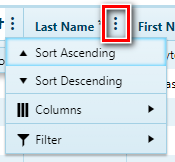
To sort a list, click the dots.
You can click to add Works, Sections, Details, and Items sections to the list. Scroll down the page to see them.

You can click to add Works, Sections, Details, and Items sections to the list. Scroll down the page to see them.
Searching Main Tables
Use Search for quick searches using a keyword or phrase (put phrases in quotes). Use Advanced Search to specify any number of criteria across all tables.

You can search any, as well as multiple categories, by selecting them on the sidebar. A tab for each selected category shows on the top of the page. The page below shows all the selected tables.


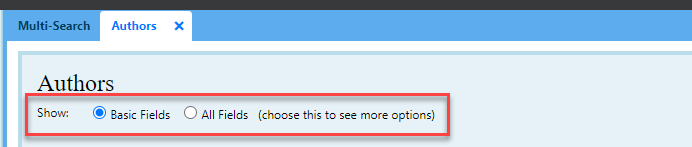
Basic Fields and All Fields Search
When searching within a specific category, a user can search by Basic Fields (this is default) or All Fields. In the example below, a Basic Fields search may include details such as Last Name, First Name, and Gender. Whereas an All Fields search includes multiple options such as Title, Organization, Birth Month/Year, etc. Choose the option that is most appropriate based on the amount of information you have to search off of.
Other Search Features
This section describes many of the cool features a user has access to on thesifter.org. In addition to searching and browsing the database, a user may save search results (for future use) and edit records within search tables.
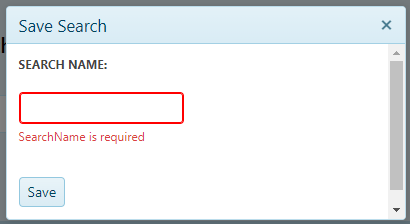
Saving Search Results (the searches are saved on your computer, not in the program)
To save your search results, you must be logged in to your user account.
After getting your search results, to save the search, return to the Multi-search tab.
To save, click . The popup below allows you to name your search and save it.

You can also Run a Saved Search or Delete a Saved Search.
To perform another search from this page, enter your term in the text box, then click
.
You can also access this search page by selecting the
Advanced Search button or by selecting Browse/Search from the main navigation.
Running a Saved Search
Click .


The popup below allows you to select the Saved Search name.
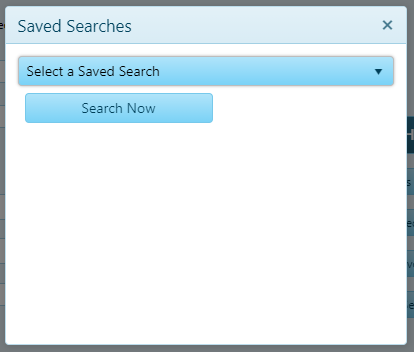
After making your selection, click to retrieve the search results.

Deleting a Saved Search
Click .

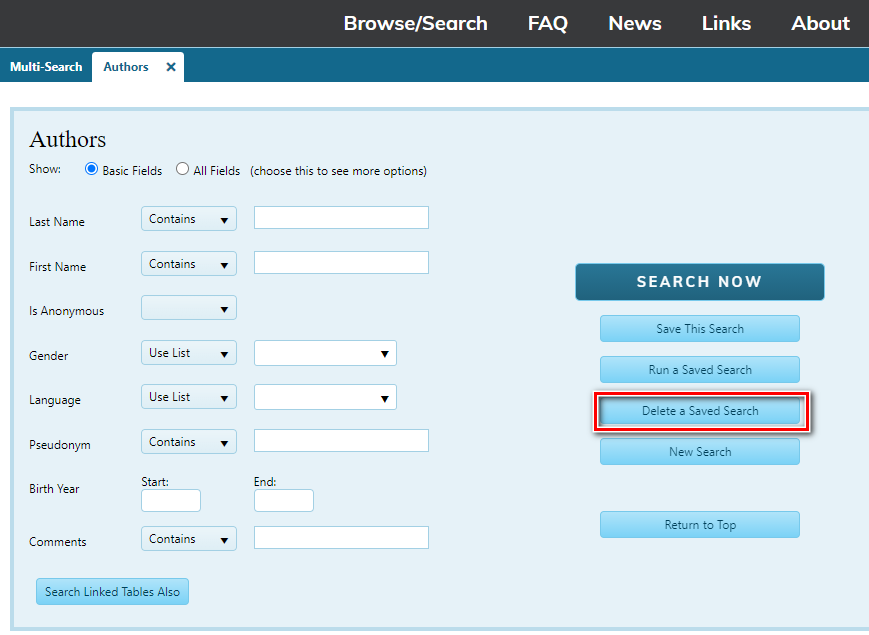
The popup below allows you to delete the Saved Search name.
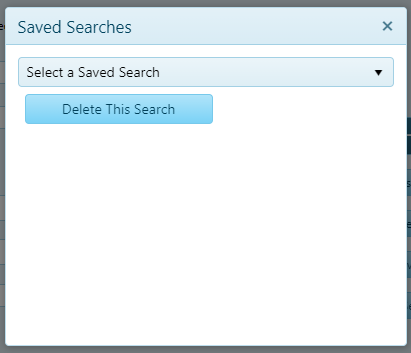
After making your selection, click .

Starting a New Search
Select .

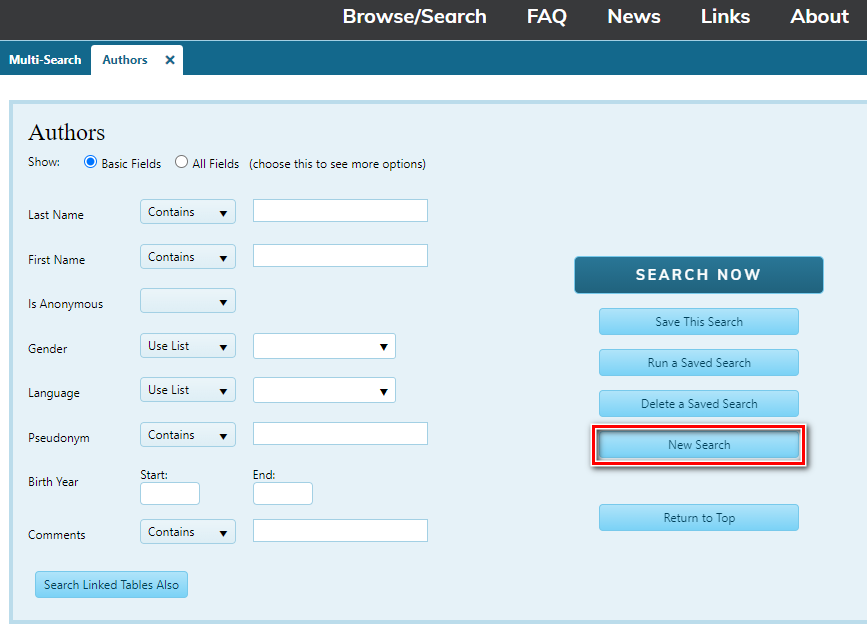
A blank search page opens.
How to Edit Records within a Main or Lookup Table
In addition to Sifter database access, you can edit information listed in the database. Note: This feature is accessible to logged-in users only. You must register with The Sifter and be signed into your account to access this feature. A reason to edit a search table may include, correcting spelling and/or grammar, adding a new record to the database, duplicating a record, or deleting a record.
To edit an entry:
- Log in
- Go to Search/Browse
- Select a category to browse or start a search
- Once the list populates, select Start Editing.
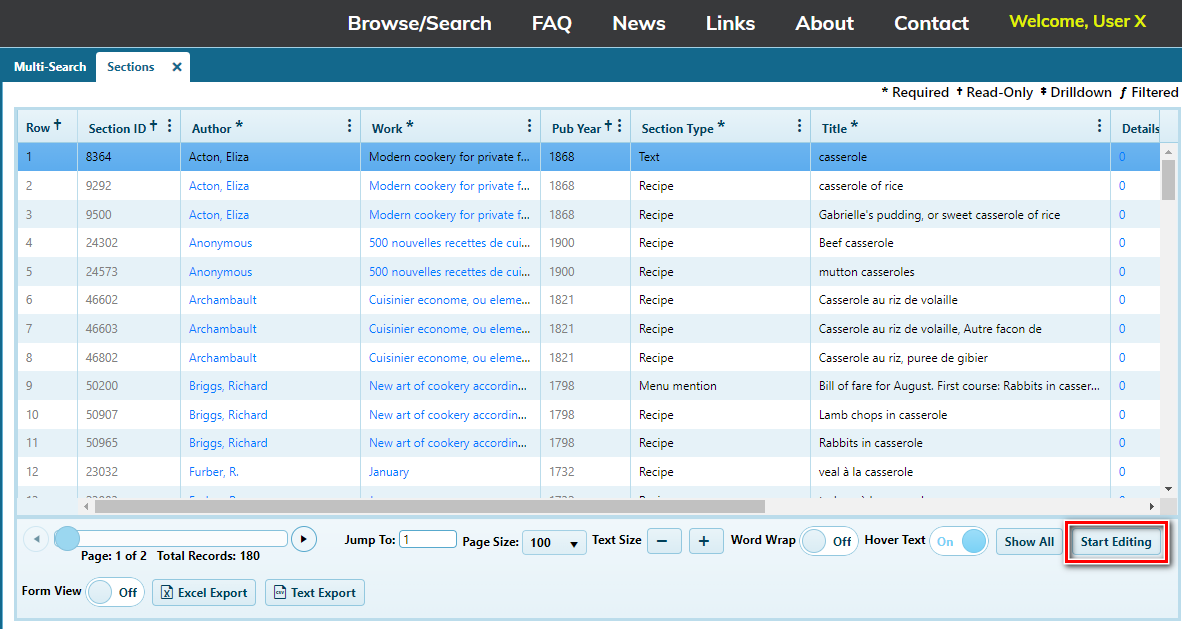

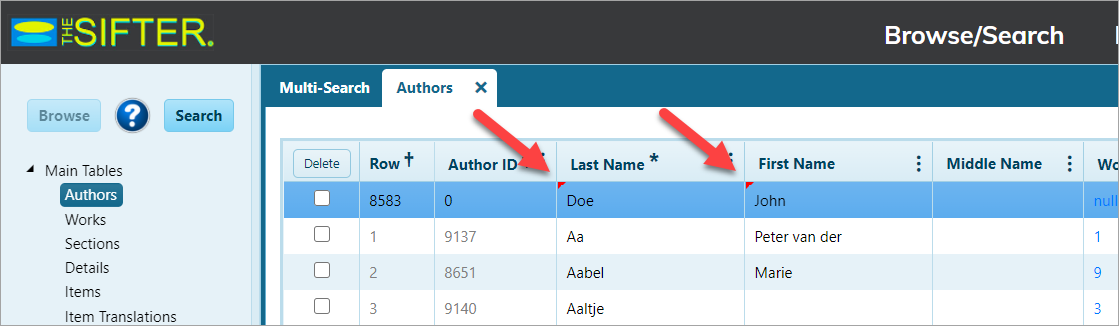
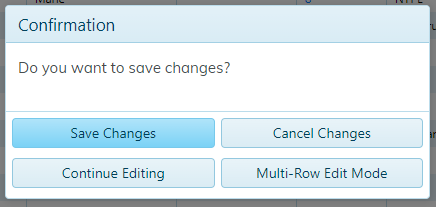
To edit an item, locate the item in the row and column and click the row. The row highlights in blue and you can make edits in that item row. For example, click under the First Name column to open a text box. Change “M” to “Mary.” Click out of that text box. A Confirmation popup opens.
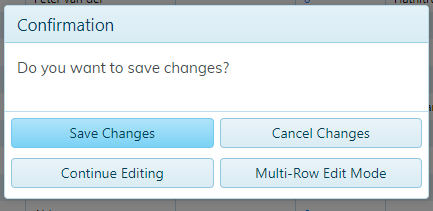
Select . Continue making any other edits.

After all your edits have been made, select Stop Editing.


Select Save Changes.


Once editing is complete, select the Stop Editing button to return to view-only mode.
Adding a Record
To add an item to the search database records, select the desired category or table. Click Add new record.


A new blank row is added at the top of the table. Select each field and type the information into each field. Note: Some fields are required before the new entry can be saved. Required fields will vary based on the category. You will be notified if any required fields remain when attempting to save. Once the new record is complete and all desired/required information is filled in, complete the entry by selecting Save Changes.
If an item has been edited and NOT saved, the fields will display a small red flag in the top left corner of each text field. This indicates the field has been edited but not saved.
Once adding is complete and editing is complete, select Stop Editing to return to view-only mode.
Deleting a Record
To delete a record in the database, select the check box for the record you want to delete.
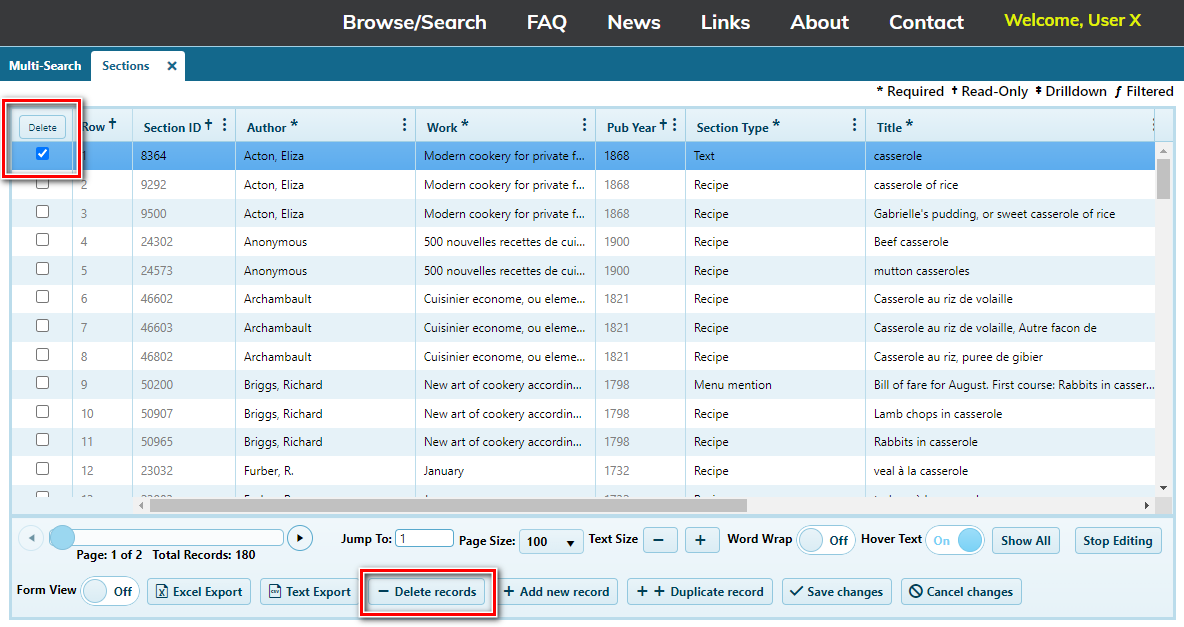
Then click Delete records. A Confirmation popup opens.


To continue with the deletion, select Yes (or Cancel to stop the process and return to the table in edit mode). If you answered Yes, a warning Confirmation popup opens. Select Yes, No, or Cancel. Once the confirmation is confirmed, the selected row will be deleted. If finished editing, select the Stop Editing button to return to view-only mode.
Duplicating a Record
To duplicate a record within a table, select the check box next to the desired record and select the Duplicate record button.


The record duplicates itself at the top of the list. Again, a Confirmation popup opens.
Select Save Changes. The Confirmation popup below opens.
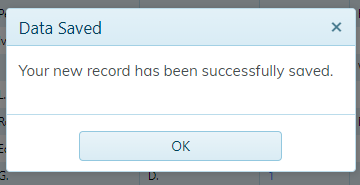
Click OK.
When all your changes are completed, select Stop Editing.
Selecting the Stop Editing button returns you to the view-only mode.
© 2019-2026 Barbara Ketcham Wheaton